Beds and Beds
We are building tons of beds over here!First, we have been working on building raised beds for our personal garden where we will plant a large variety of veggies not to sell but to eat! We are building these beds out of cedar fence pickets and free pallet wood.
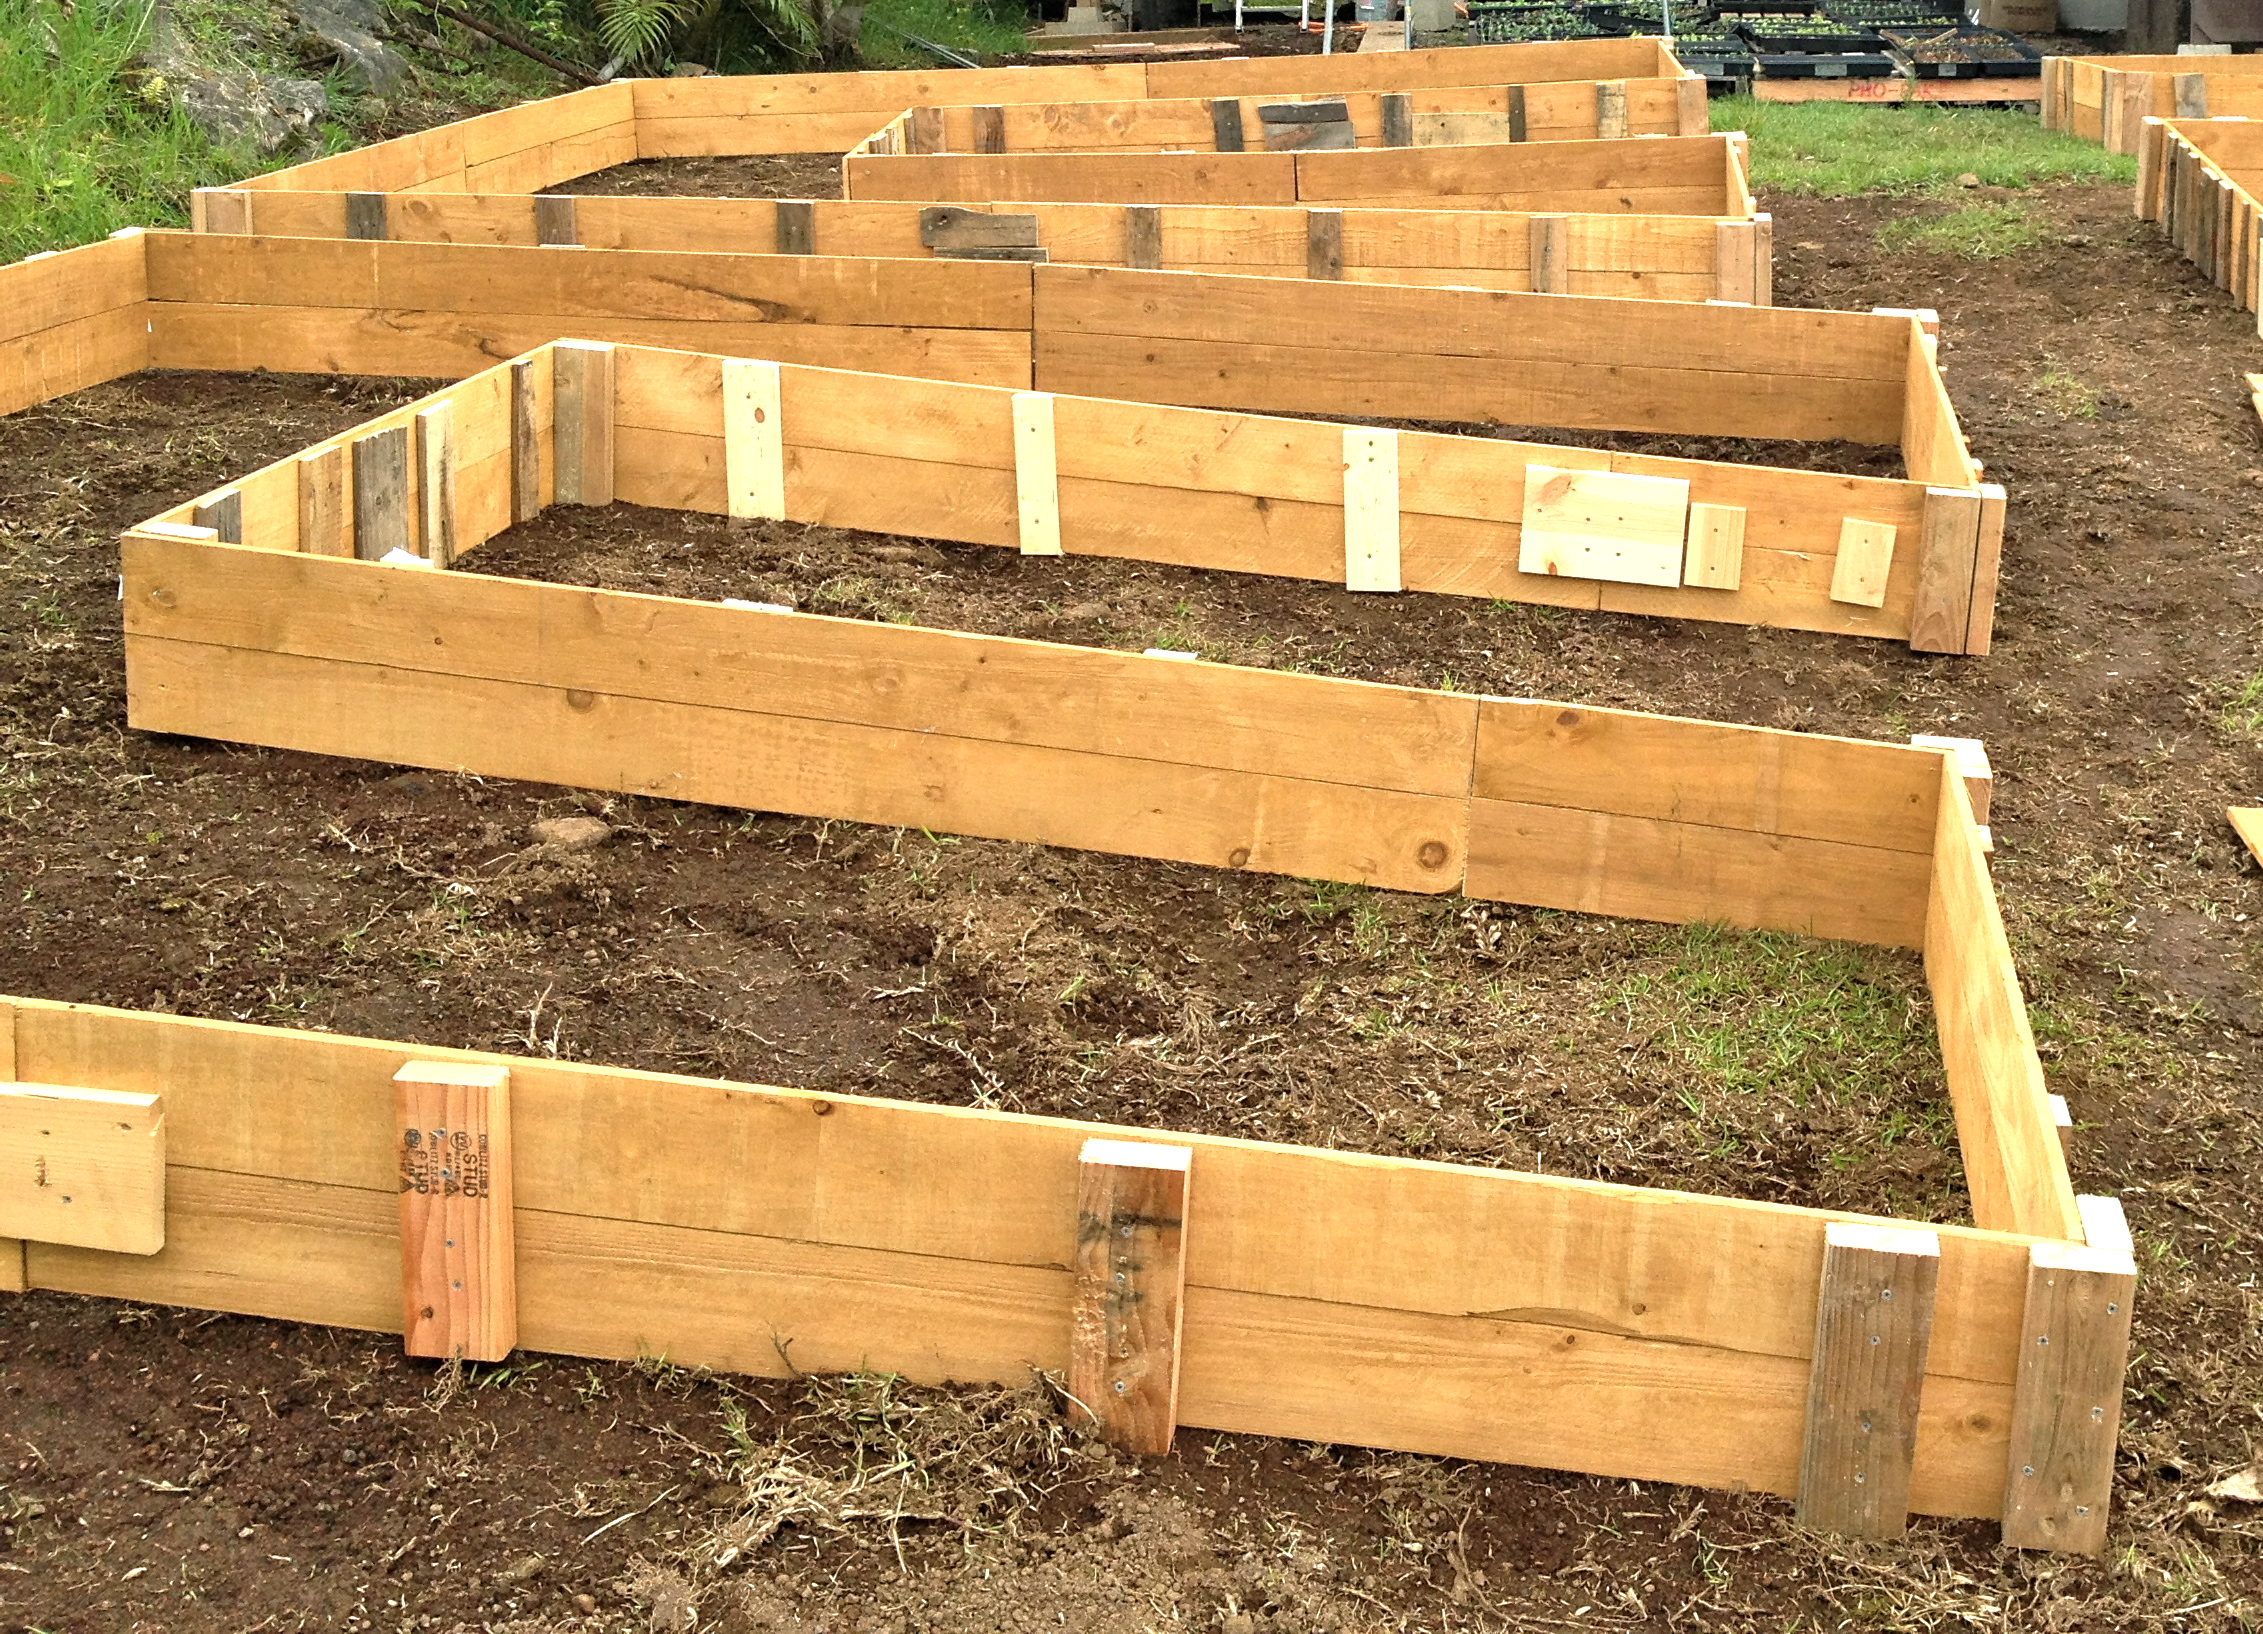
We knew for awhile we were going to want a large personal garden and that we would have to do raised beds to be able to grow the variety of veggies we want. Root vegetables, for example, need a lot more soil than we have at our farm. So by filling the raised beds (which are 11" tall) with soil, we are giving them plenty of space to grow.

Even though we knew we wanted raised beds, we were not sure what would be a cost effective, sturdy and lasting material to build them out of. Ideally we wanted to use wood, but the cost of wood at the sizes and amount we needed would be too expensive. This is because if we were to use wood, we would need to use a wood that is naturally resistant to rot and decay, like cedar or redwood, rather than a pressure treated wood. Pressure treated wood, which also is resistant to rot and decay and is cheaper than cedar or redwood, has chemicals in it that would leech into our soil (obviously something we would want to avoid). However, cedar and redwood are very expensive! Especially in the size and quantities that we would need to build raised beds.
Then last week I was looking at Ana White's blog and saw her plans for cedar raised beds made from fence posts. The reason she used cedar fence posts, and the reason her plans really caught my eye is that they are CHEAP! A 5/8" x 6" x 6' cedar picket is only $3 whereas a regular 1"x6"x8' cedar board in Hawaii is $12. A quarter of the cost! Yes, a 5/8" board is much thinner than a 1" board, but because we do not need a specific thickness for our raised beds, using fence pickets is a huge money saver!

We decided to build the beds 2 boards high for better soil depth and use a "keyhole" bed design to can get more square feet of garden for our money. For example, a 12'x3' rectangular bed would use 10 cedar planks (four on the long sides and one on each end) and cost $30 for 36 square feet of garden.

Our keyhole bed which is 112 square feet and uses 22 boards is only $66.

That is a savings of 25 cents/square foot. Which, over five beds and 560 square feet adds up to $140 of savings! Mrs. Long (my 9th grade geometry teacher), if you're reading this, thank you for these mad skills - you were right, they did come in handy in real life. Still have never needed proofs though... just saying.

Anyway, we are still in the process of building the beds and will be filling them in with soil and compost next week for planting. I will post pics of that soon!
The other new bed in our life is Doug's and my kingsize farmhouse bed! I built it almost entirely by myself, which made me feel really accomplished because it is so big. Before our new bed (pictures at the end of the post...) we had been sleeping on our mattress on the floor in a room FILLED with furniture because we are currently building the brewery where all of this furniture is going.
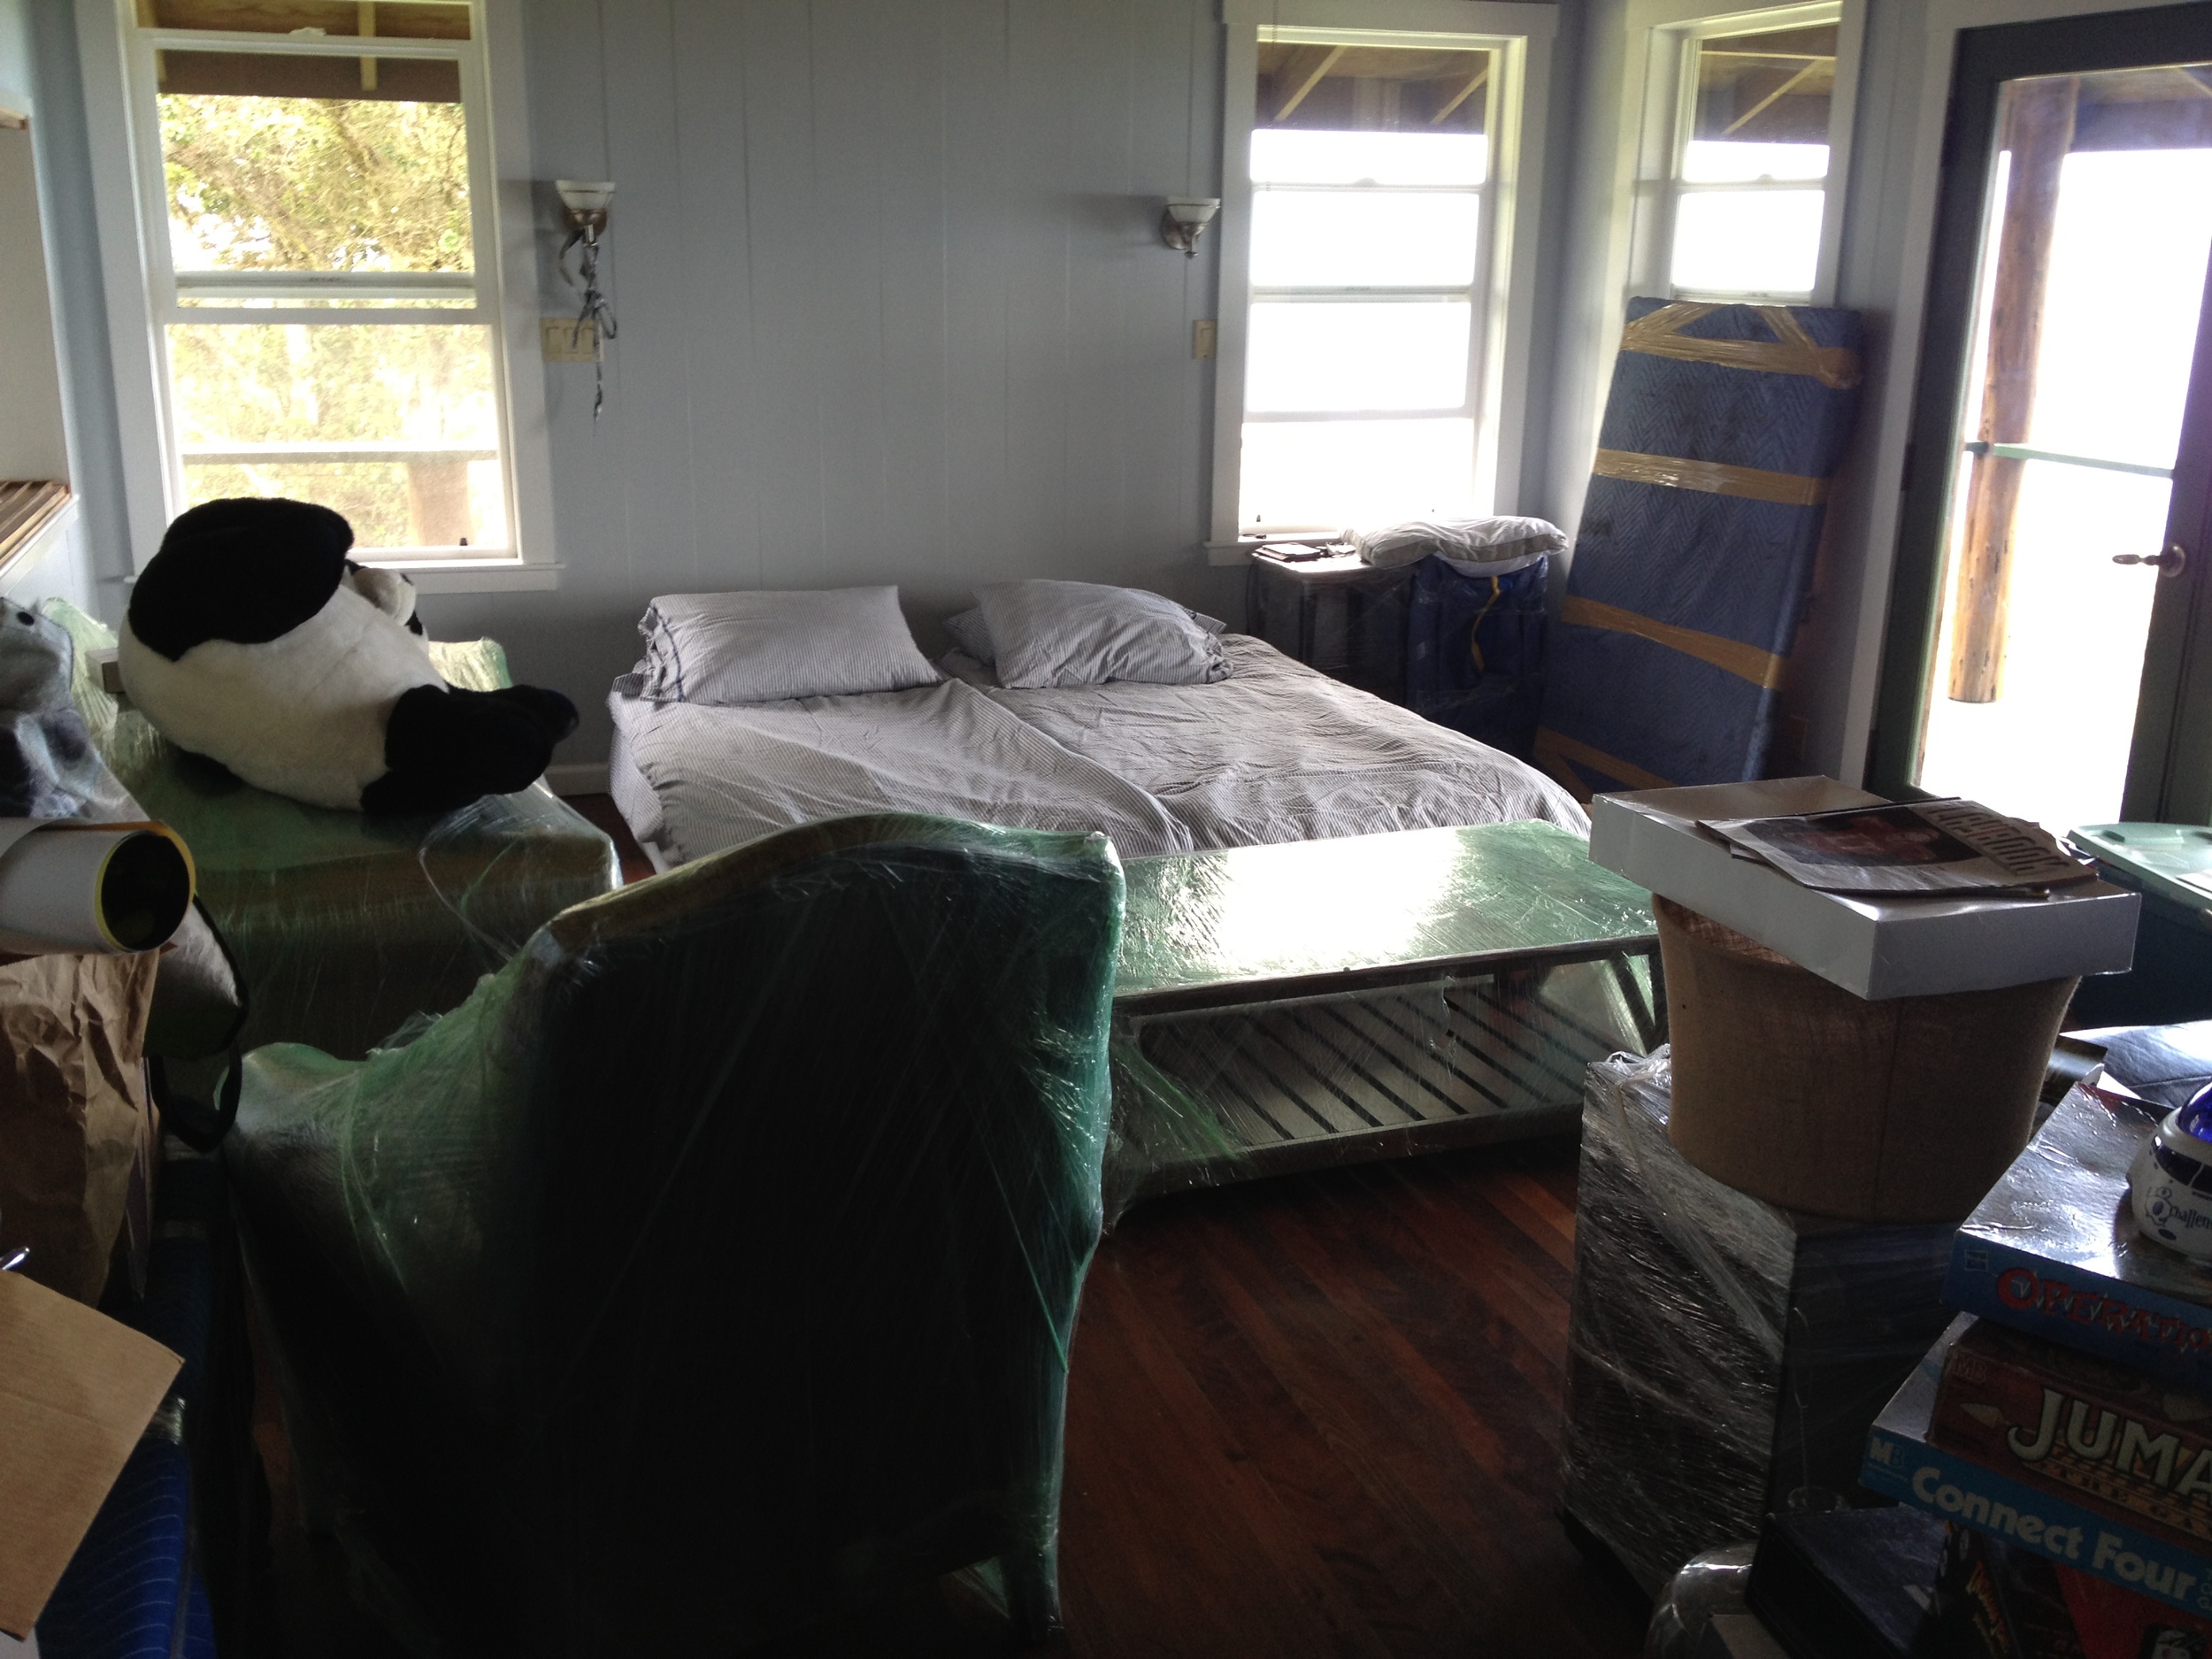
Now, we are sleeping on a bed in a room filled with furniture! A big upgrade if you ask me.
I built the bed frame from these plans for a California King Farmhouse bed. My thought process when looking at all of the different bed frame plans was "hey, we have a california king mattress and we also have a farmhouse - perfect fit!"
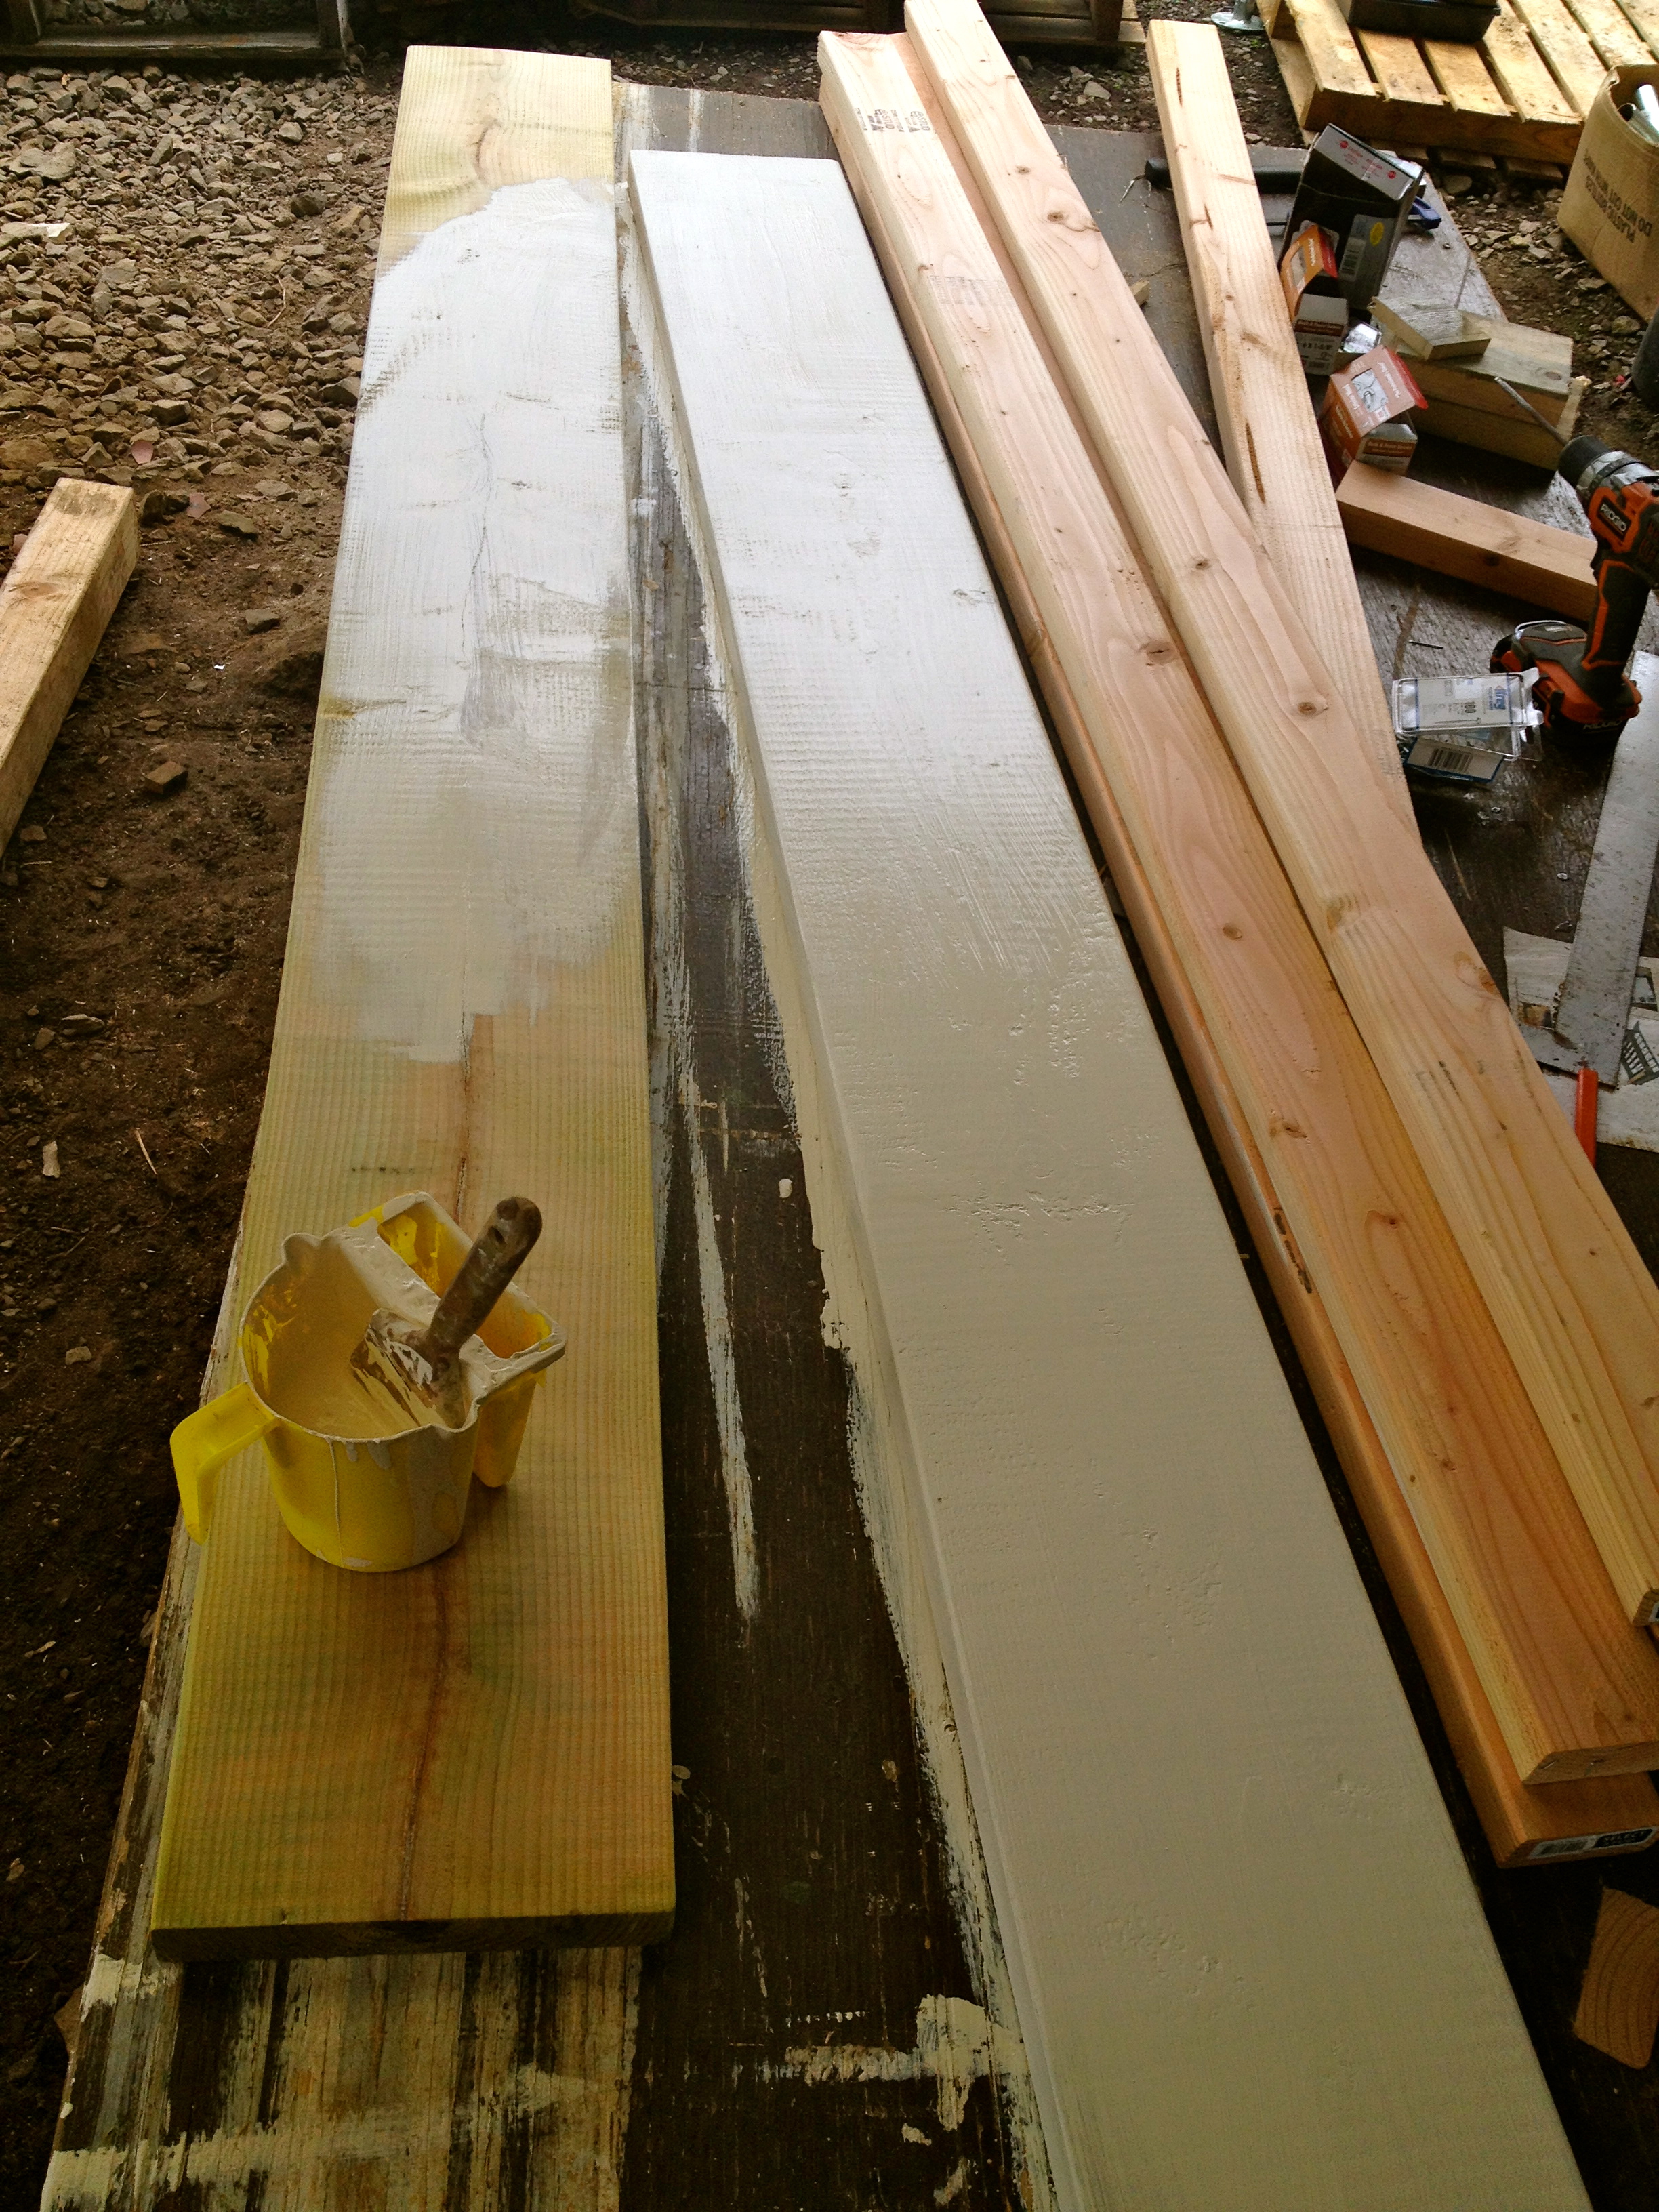
I started out by building and sanding the headboard and footboards and then painting them "antique white."


Then I cut the side rails, and painted those white.
Once the siderails were dry, with the help of 5 other people, I screwed together the bed frame (it was heavy and big!) and we carried the bed down to the house in three pieces (the headboard, footboard and frame). Then we assembled it in the bedroom.

 Once assembled, I could not wait to put on the mattress and test it out.

When the mattress was on we could not believe how tall the bed was! I had built it six inches taller than the plans so that the dogs wouldn't be able to jump up. But once the mattress was on, the bed was 32 inches tall! Doug and I can hardly jump up, never mind the dogs!
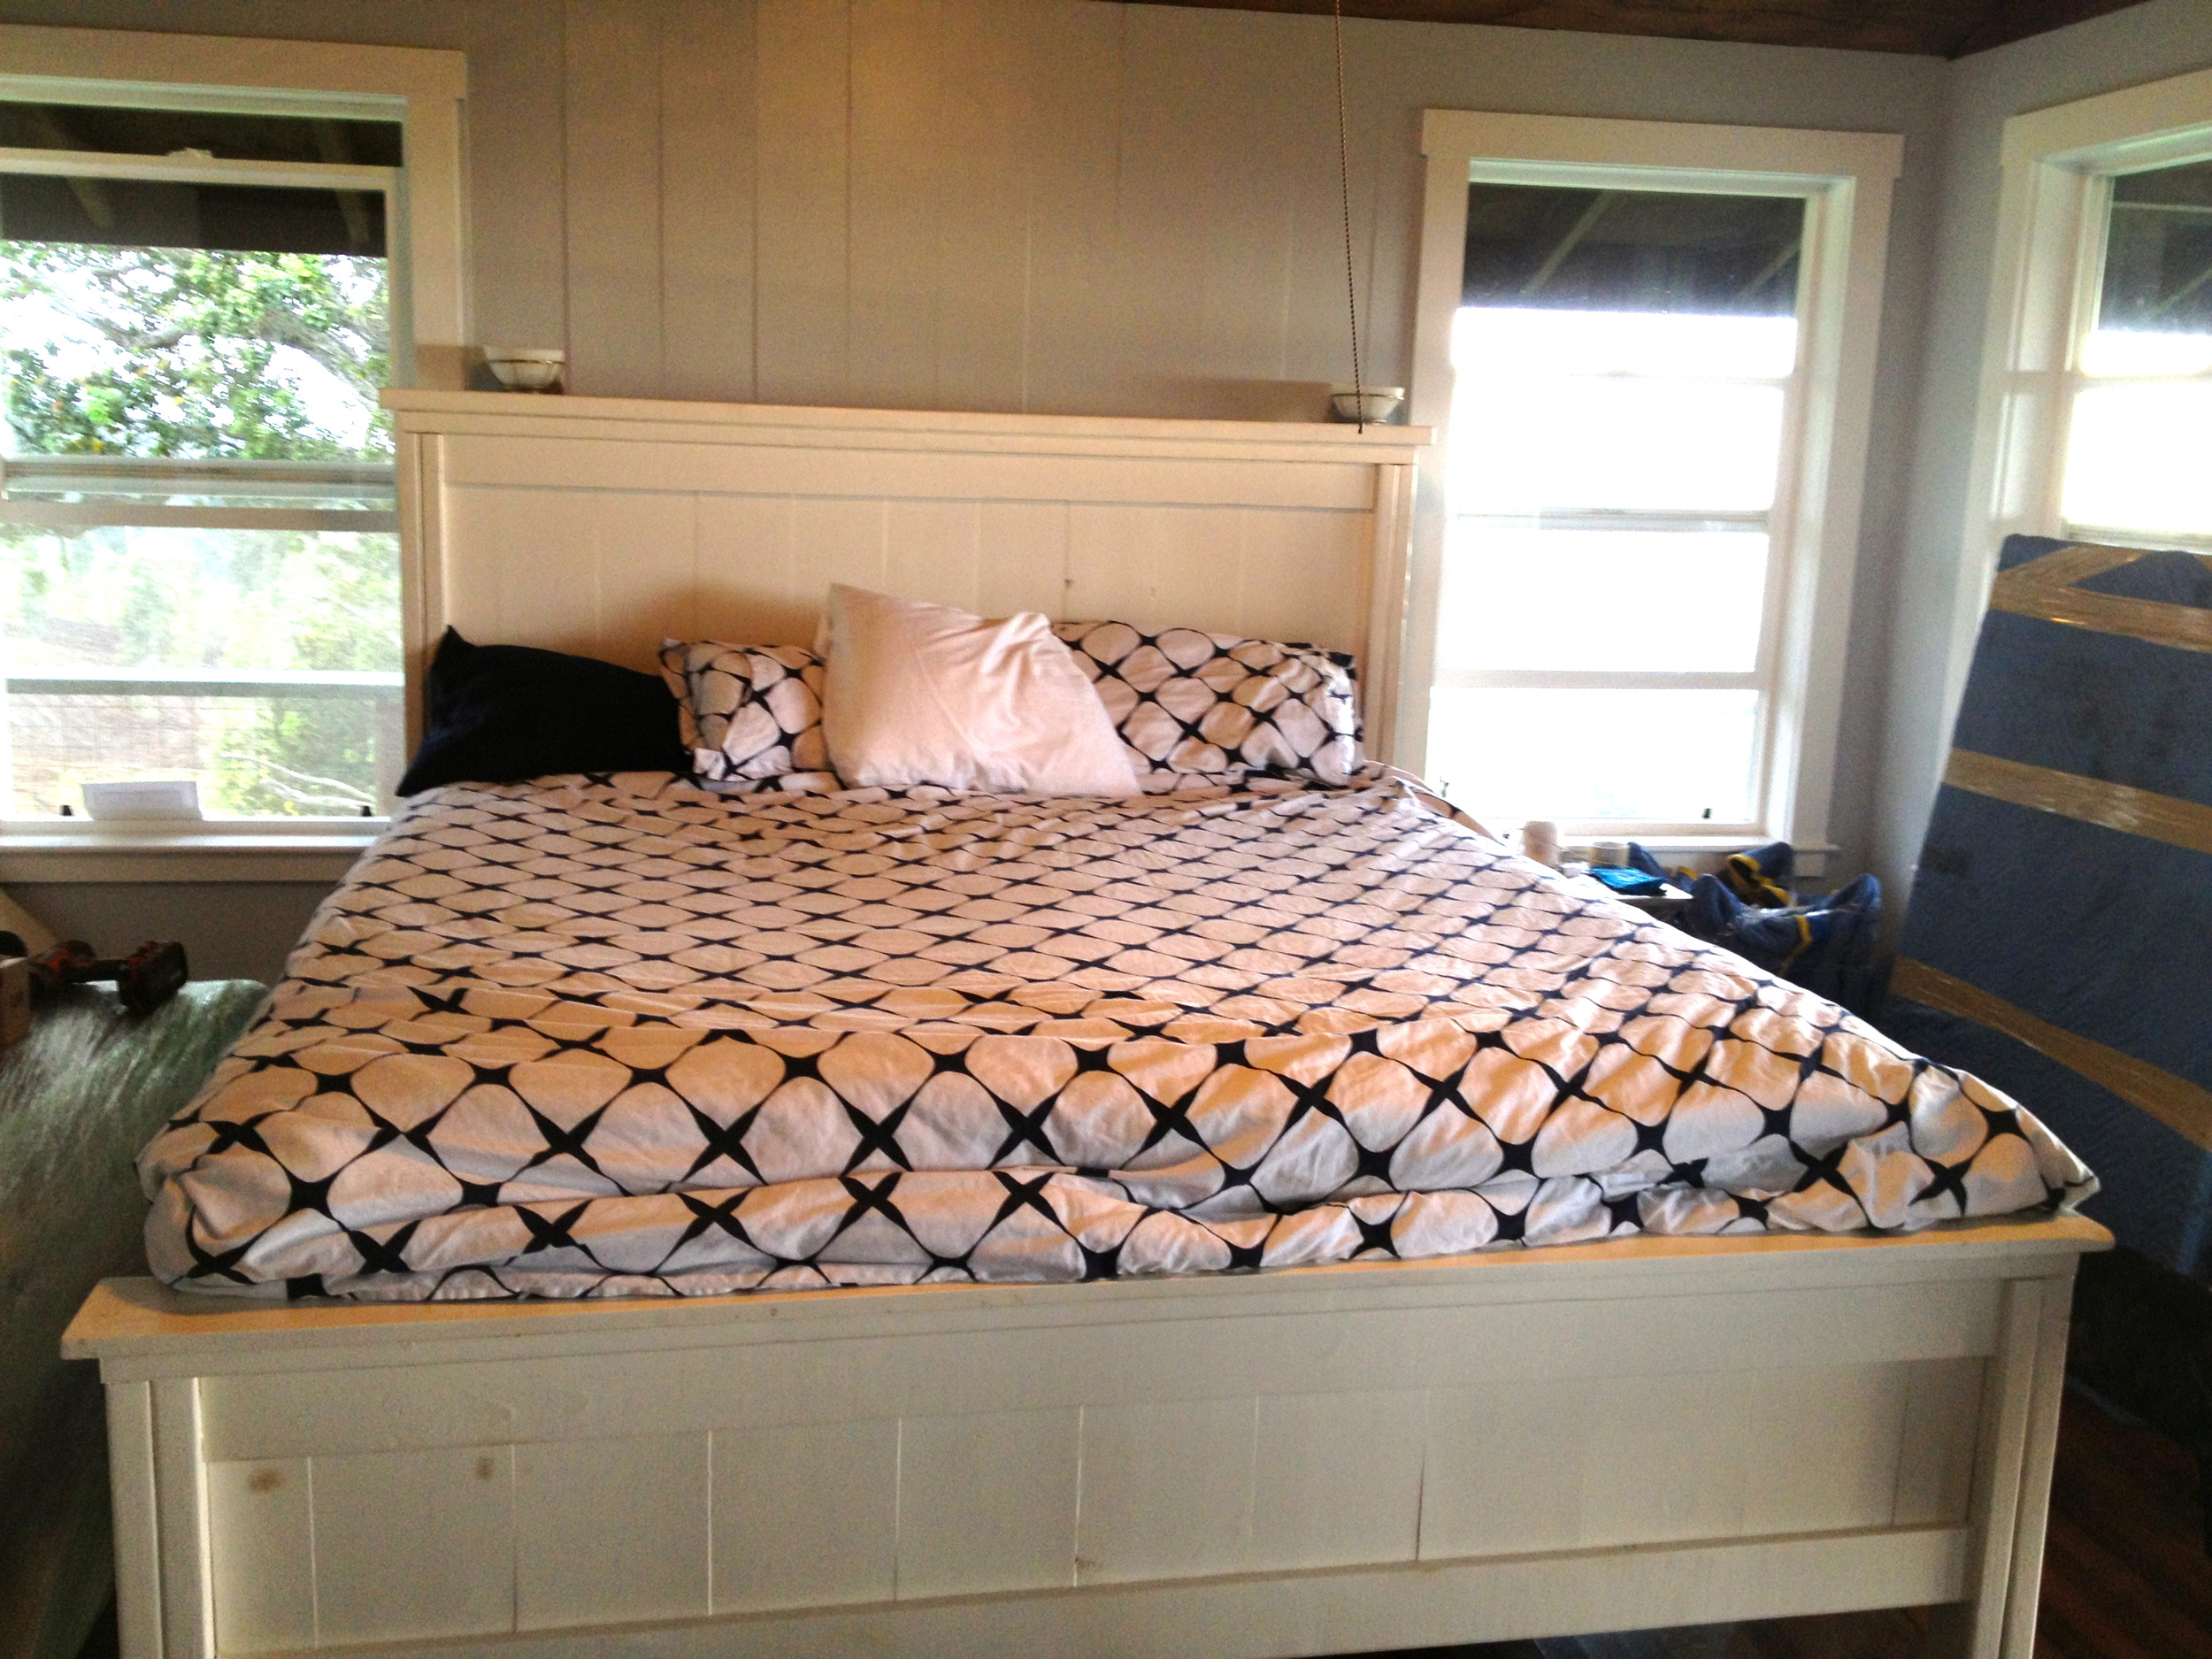
We might shorten it to a non-giant height, but for now, it is nice not to have to change our sheets every three days because of dog hair. Overall, we are loving the new bed, although I'm sure Bruce and Bells are sad they can't cuddle with us in the bed anymore...